The good news is there are fixes you can use to regain the function. Typically, you’ll have misconfigured system settings, a lack of permissions, or problems with hardware or with Windows itself. If you’re unsure where to get started, here are six fixes you can try to get network sharing up and running on your Windows 11 PC.
1. Make Sure Network Sharing is Enabled
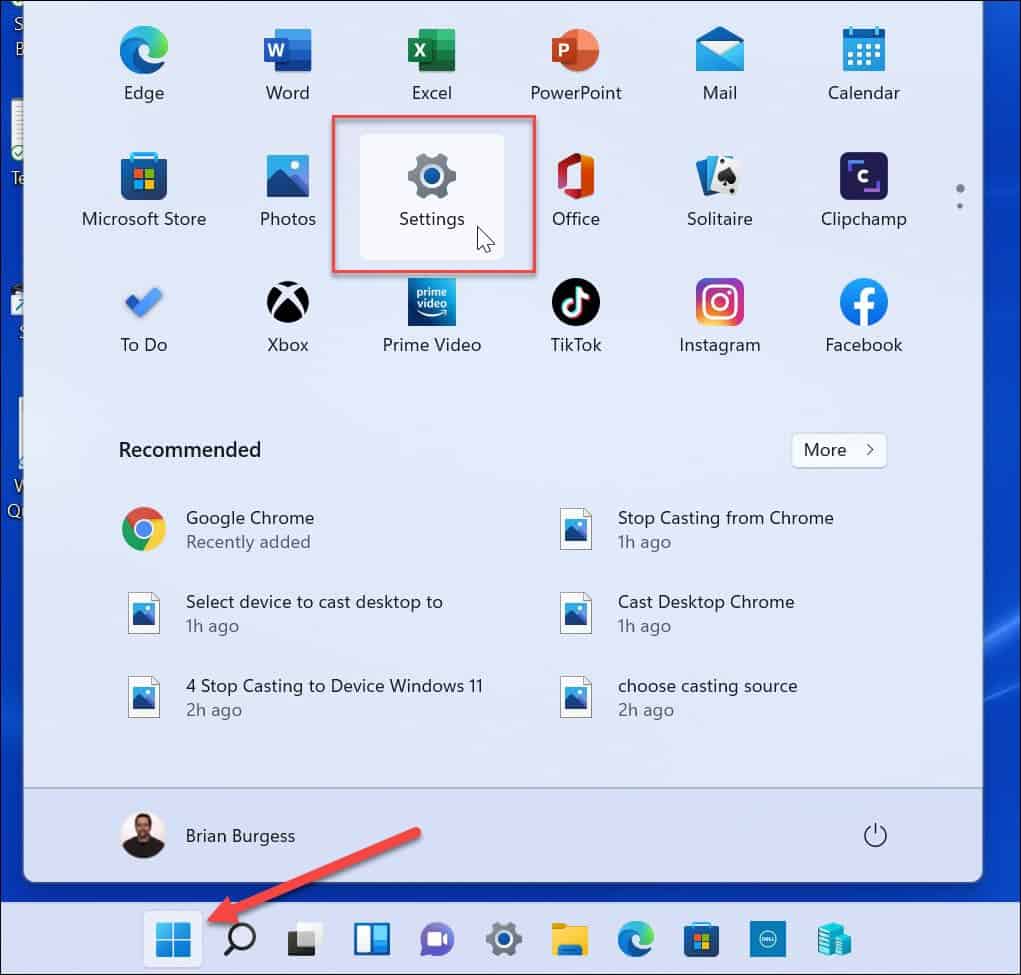
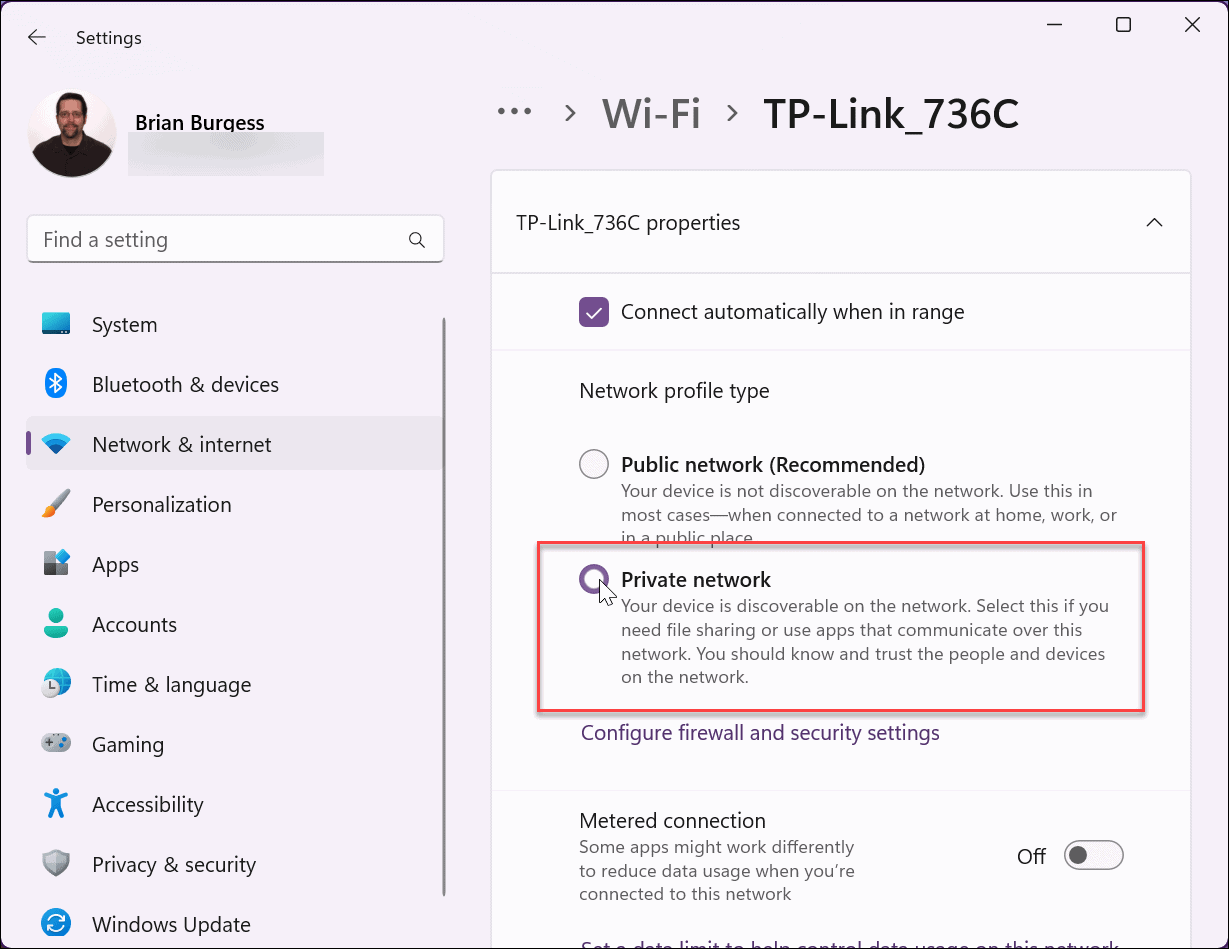
The network and sharing feature was first introduced on Windows 7 and has remained a part of Windows since, including Windows 11. And a perfect place to start is ensuring that network discovery is enabled. Note: If you have several PCs running Windows 11, check the following settings on all computers you want to share with. To enable network sharing on Windows 11, use these steps:
2. Check for Windows Updates
You should always ensure Windows is up to date to get the latest bug fixes, security updates, and features. For example, if a bug in the OS causes the network sharing not to work on Windows 11 issue, a fix from Microsoft might be waiting for you. While Windows updates in the background, it doesn’t always get everything, and you’ll want to update Windows 11 manually. To check for updates:
3. Restart Your PC
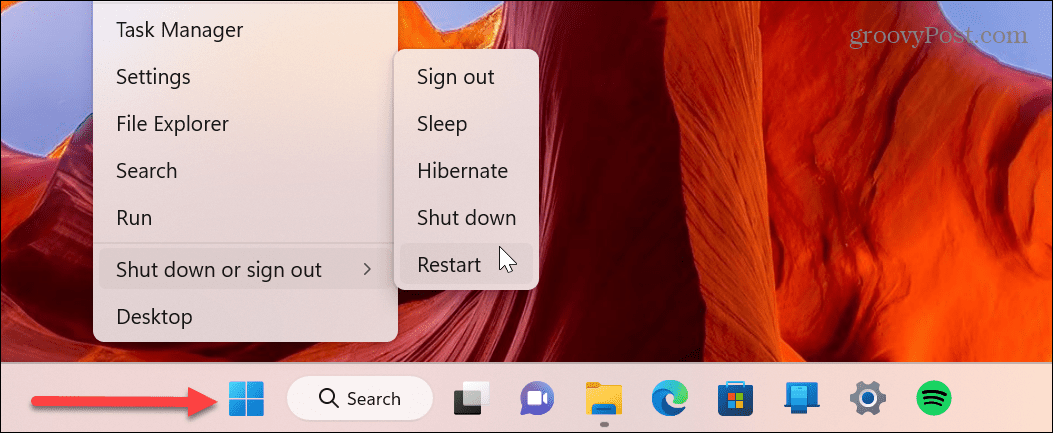
Restarting Windows 11 can fix various issues, including network sharing not working. For example, there could be a temporary bug or a problematic app causing the problem. There are different ways to restart Windows 11, but an easy method is to right-click the Start button and select Shut down or sign out > Restart. After the restart, sign in and see if the network and file sharing feature is working.
4. Check and Re-enable Sharing Settings
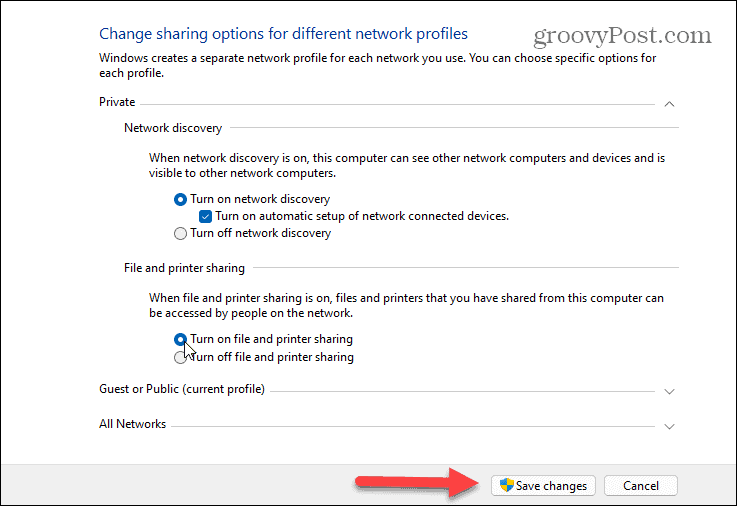
The network and file sharing feature is enabled by default on Windows 11 for private networks. However, if it’s not working, you can double-check the settings and re-enable them if necessary. Use these steps to verify network and file sharing:
5. Enable Folder Sharing Option
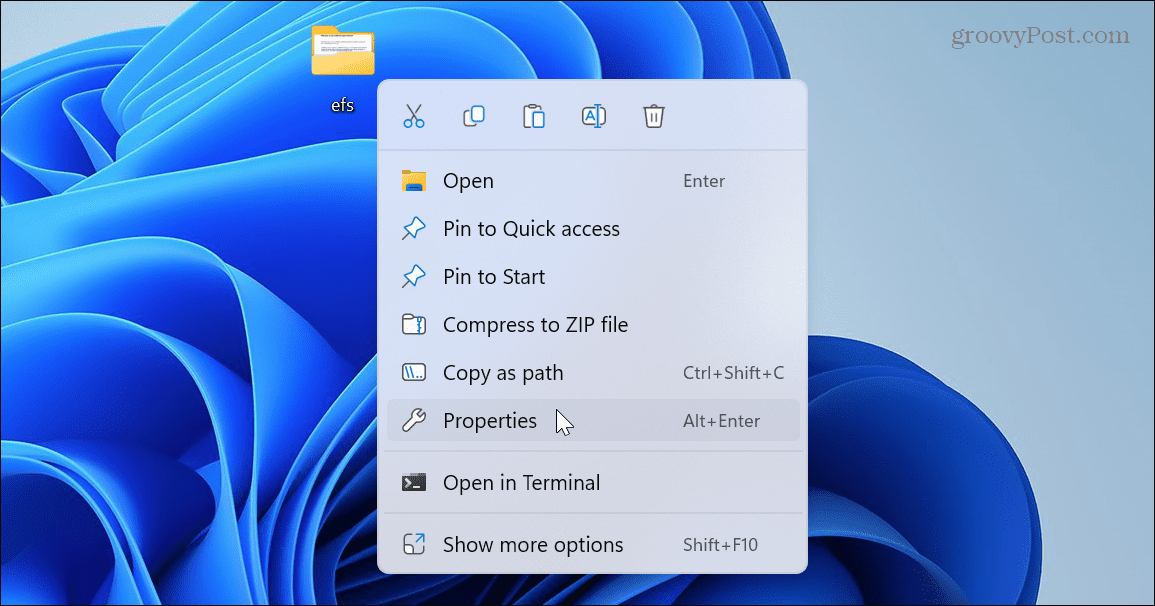
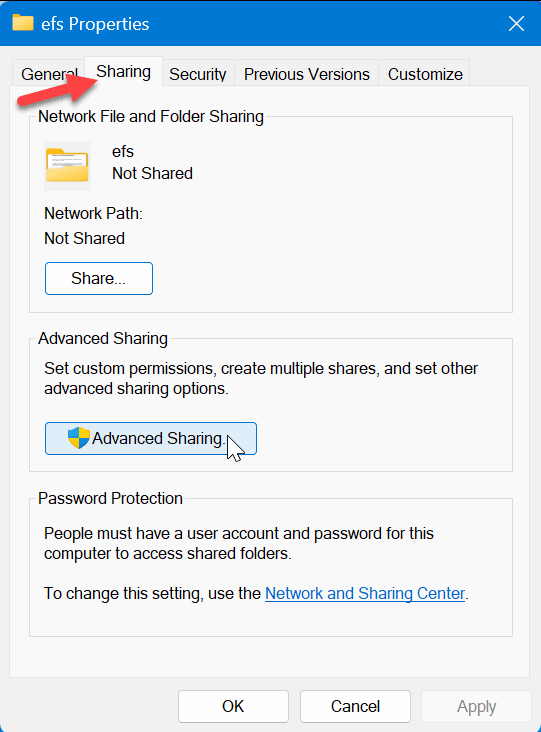
Another issue you may run into is the folder you want to share doesn’t have the necessary options or permissions. To enable sharing on the troublesome folder, do the following:
6. Disable Password Protected Sharing
If password-protected sharing is enabled, the person trying to access a file on the network needs to know the credentials. To avoid that issue, you can disable it.
Using Windows Settings
To disable password-protected sharing on Windows 11:
Using Control Panel
To turn off password-protected sharing via Control Panel:
Sharing Files on Windows 11
If you run into a problem with network sharing not working on Windows 11, you can’t share files among Windows PCs. However, you can use one or more of the above steps to get it working again. There are other ways to share files and devices with Windows 11. For example, you might need to share a printer or use the Nearby Sharing feature for quick file transfers. And if it’s not working, you’ll need to know how to fix Nearby Sharing on Windows. If you aren’t running Windows 11 yet, you can share files with PCs with Nearby Sharing on Windows 10. In addition, you might be interested in learning how to share files, storage, printers, and other items on Windows. When you visit a unique website on your iPhone and are within range of a PC, you can share web pages from iPhone to Windows. And for best sharing option between mobile and PC is to use Android with the Your Phone app on Windows 11. Comment Name * Email *
Δ Save my name and email and send me emails as new comments are made to this post.
![]()

