Creating and customizing tables in Word is simple to do. If you want your table to appear as part of the text rather than outside it, then you’re going to need to know how to wrap text around a table in Word. If you want to wrap text around a table in Word, follow these steps.
How to Wrap Text Around a Table in Word
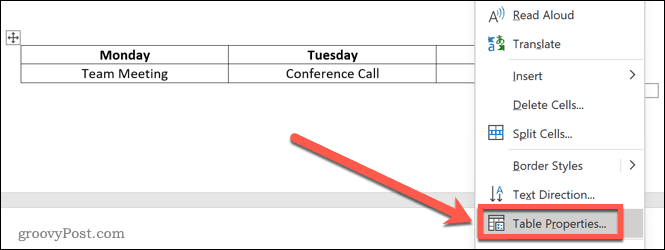
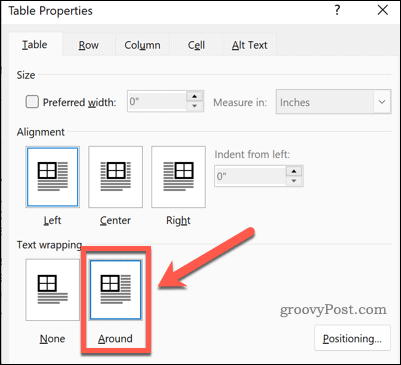
By default, tables in Word are placed on their own line. To wrap text around a table in Word:
How to Resize Your Table in Word
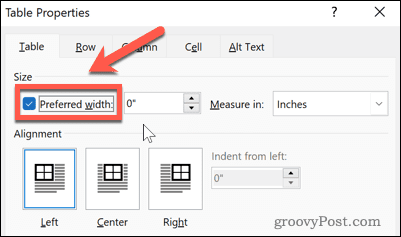
Now that your text is wrapped around your table, you can reposition the table where you want it. Before you can do so, however, you’ll need to be sure that it’s the right size. To resize a table in Word:
How to Reposition a Table in Word
Now that your table is the size that you want, all that’s left is to move it to the required position. There are two ways to do this. The first is to drag the table into position. To position your table in Word by dragging it:
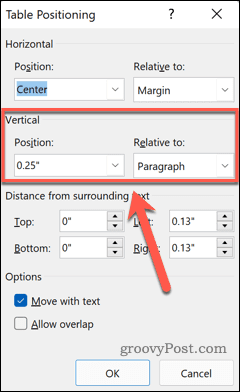
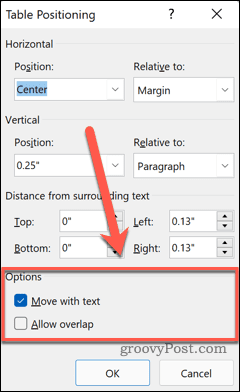
Positioning Your Table in Word Using the Table Positioning Options
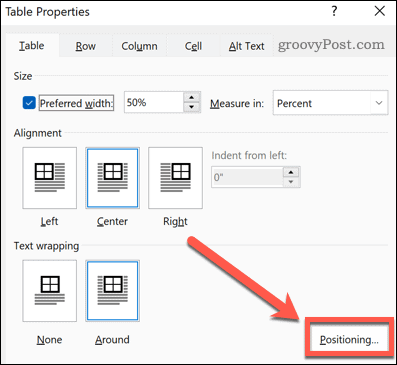
The above method won’t always leave the table exactly where you want it. It may be affected by line breaks, or be incorrectly aligned. You can move your table more accurately by using the Table Positioning options. Here’s how:
Using Tables in Word
Knowing how to wrap text around a table in Word can help you to create a document that looks exactly as you imagined it. Tables aren’t just for spreadsheets; they can be a useful way to impart information in a Word document too. Working with tables in Word is fairly straightforward once you know what you’re doing. Once you’ve created your tables, you’ll need to know how to add rows and columns to your table. If you want to combine tables, then it’s also useful to know how to split and merge tables in Word. You can even split and merge table cells in Word to create tables with different-sized cells. Comment Name * Email *
Δ Save my name and email and send me emails as new comments are made to this post.
![]()

