Here, we’ll walk through the basics of creating, editing, and applying labels in Gmail.
Labels Versus Folders
While labels in Gmail are similar to folders in other email applications, Google makes the difference clear. So, keep this dissimilarity in mind when working with labels in Gmail.
Create a Label in Gmail
You have a few places in Gmail where you can create a label. You can do so in your Settings, from the toolbar, or using the menu on the left.
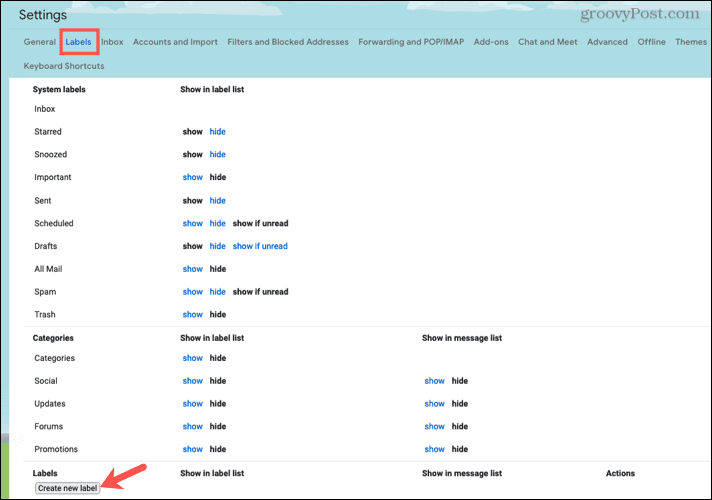
Create a Label in the Settings
To access the label section of the settings, click the gear icon on the top right and pick See all settings in the sidebar. In the Settings area, choose the Labels tab. At the top, you’ll see System Labels and Categories. These are Gmail’s default labels. You cannot edit or remove these labels, but as you can see, you can hide labels if you like. Go to the bottom, in the section called Labels, and click Create new label. Any labels you set up will then display in this area.
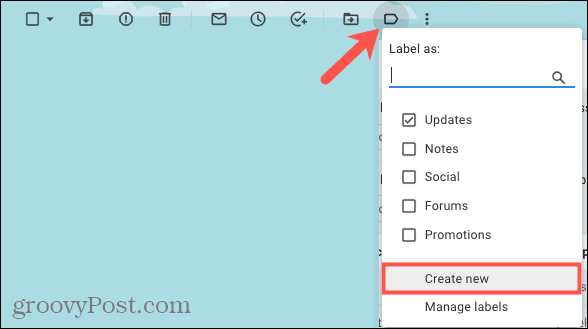
Create a Label From the Toolbar
You can create and apply a label simultaneously from your inbox with a message selected or from the email window. Click the Label button in the toolbar at the top and pick Create new.
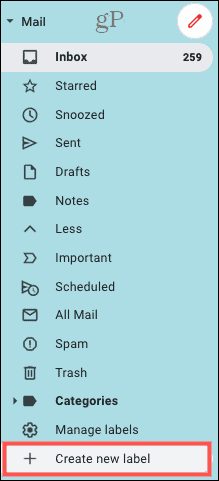
Create a Label From the Side Menu
Whether you hide or show the left-side menu, you can create a label from it as well. At the bottom of the list, click More and select Create new label.
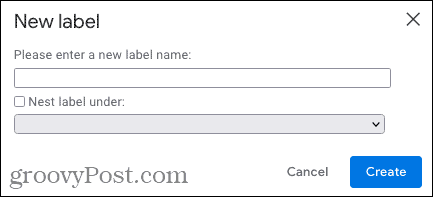
When the new label window opens, give your label a name. You also have the option to nest your label if you already have others. Click Create.
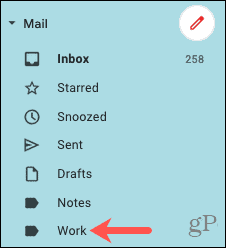
Your new label will appear in the side menu at the bottom of the System Labels. Simply select a label in this area to view all emails with that label applied.
Apply a Label in Gmail
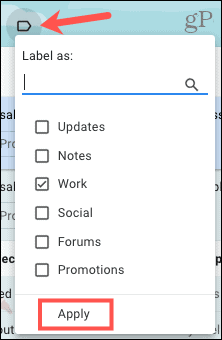
Once your label is created, you can apply it to any emails you like. Click the Label button in the toolbar in your inbox or the message window and check the box next to the label you want. Then, click Apply.
You’ll see your label next to the email’s subject line in your inbox and on the message itself.
You can set up a filter to automatically apply labels to incoming emails. Be sure to check out our how-to for using filters in Gmail if this interests you. You can add more than one label to an email or remove a label and apply another.
Apply Multiple Labels
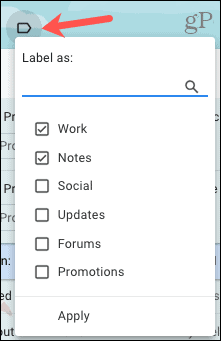
Select the email and click the Label button in the toolbar. Check the boxes for all labels you want to use, uncheck those you don’t, and click Apply.
Apply a Different Label
To apply a different label to a message, uncheck the current label, check the box for the new one, and click Apply.
Edit or Delete a Label
Like creating a label, there is more than one spot in Gmail to edit or delete one. For editing, you can change the name or label it’s nested within. If you delete a label, you’ll be asked to confirm.
Go to your Gmail Settings, select the Labels tab, and scroll to the bottom. Click Remove or Edit next to the label.
Hover your cursor over the label in the side menu and click the three dots that appear. Choose Edit or Remove Label at the bottom of the shortcut menu.
Labels for Better Organization in Gmail
Gmail Labels give you an easy way to keep your emails organized. And since you can create as many as you like, it’s the ideal feature for finding emails quickly. For more help with Gmail, check out how to manage your mailbox with multiple inboxes or how to adjust your Gmail snooze settings. Comment Name * Email *
Δ Save my name and email and send me emails as new comments are made to this post.
![]()

