The layout remains largely the same, however, with text covering the page from the left to right margins. If you want to split a Word document in half, you’ll need to change your Word document layout by adding columns or inserting tables. This guide will explain how.
How to Add Columns to a Word Document
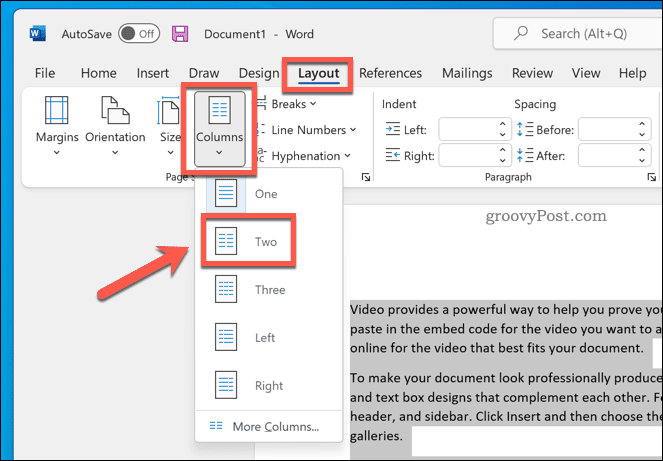
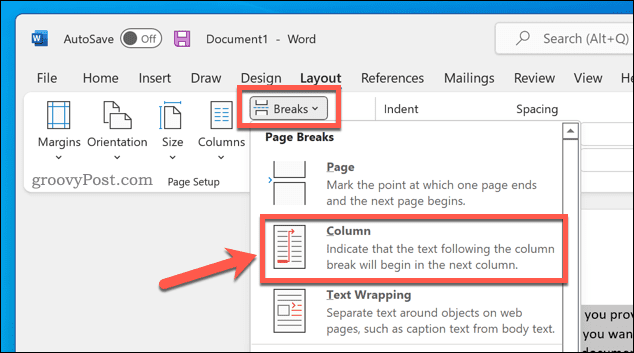
The easiest way to split a Word document in half is to add columns. Columns allow you to split the text into two halves, making it easy to create newsletters, booklets, and similar documents. These steps are designed to work for Word 2016 and later (including Microsoft 365 subscribers). If you’re using an older version of Word, the steps may vary slightly. To add columns to a Word document: Once you’ve applied the change, your Word document will apply automatically. You can then adjust your document margins to give each column more space (or less).
Using a Table to Split a Word Document in Half
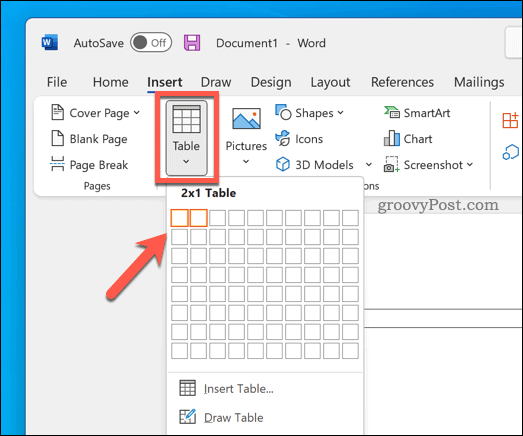
You can also use tables to split Word documents in half. This is possible by creating a two-column table that stretches from the left to right margin. As the table is the same width as the page, you can use the table to keep your two sections separated. To use a table to split a Word document: With the table created, begin writing in each column. You can adjust your table size to make one column bigger than the other. You can also customize your table if you prefer to hide the table borders entirely.
Creating Different Word Documents
Using the steps above, you’ll be able to easily split a Word document in half. You can use this to create different types of Word documents—you can even use it to create a booklet or a full-length novel. Want to get your creative juices flowing? You’ll need to remember some essential Word tips for creative writers first. If you’re wondering how long it’s taking you to finish your document, you can always track your Word editing time. Comment Name * Email *
Δ Save my name and email and send me emails as new comments are made to this post.
![]()


